Add a New Pipeline
There are many ways of creating pipelines in GoCD:
- You can create them by using Pipelines as Code, by adding pipeline definitions to a repository in formats such as Yaml, JSON, Groovy, etc.
- You can use GoCD’s extensive APIs to create a pipeline. See Pipeline Config API.
- You can use GoCD’s UI to create a pipeline (see below).
- By cloning an existing pipeline.
New Pipeline Wizard
Clicking on the Admin -> Pipelines menu item will take you to the pipelines administration page. Clicking on “Create a new pipeline within this group” button will take you to the “Add pipeline” page.
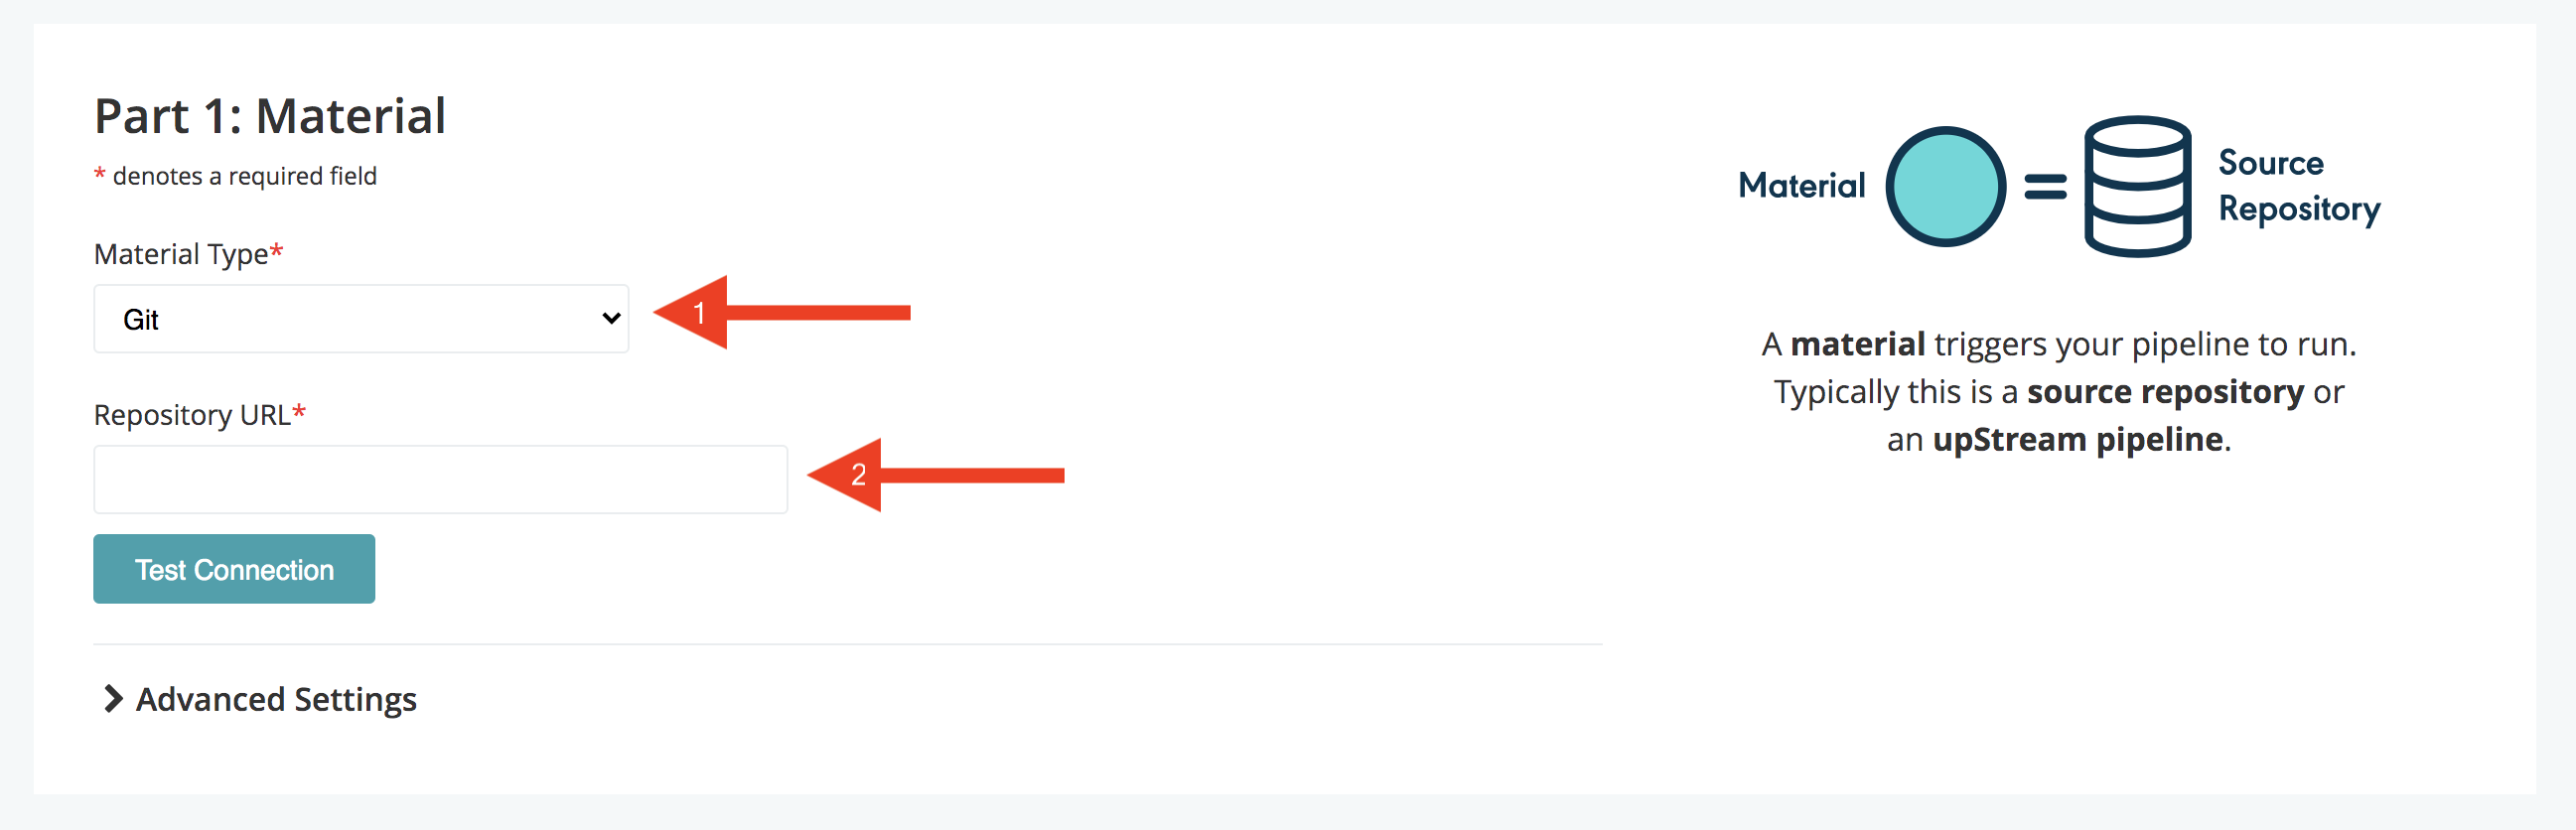
Step 1: Material
-
Choose the material type. The material can be your Source Control Management (SCM or version control) repository or another pipeline or a package repository (e.g. yum). Currently Go supports the following:
- SCMs
- Subversion
- Mercurial
- Git
- Team Foundation Server.
- Perforce
- Package repository
- Material Plugins
- SCMs
-
Fill in settings specific to the material type.
Step 2: Basic Settings
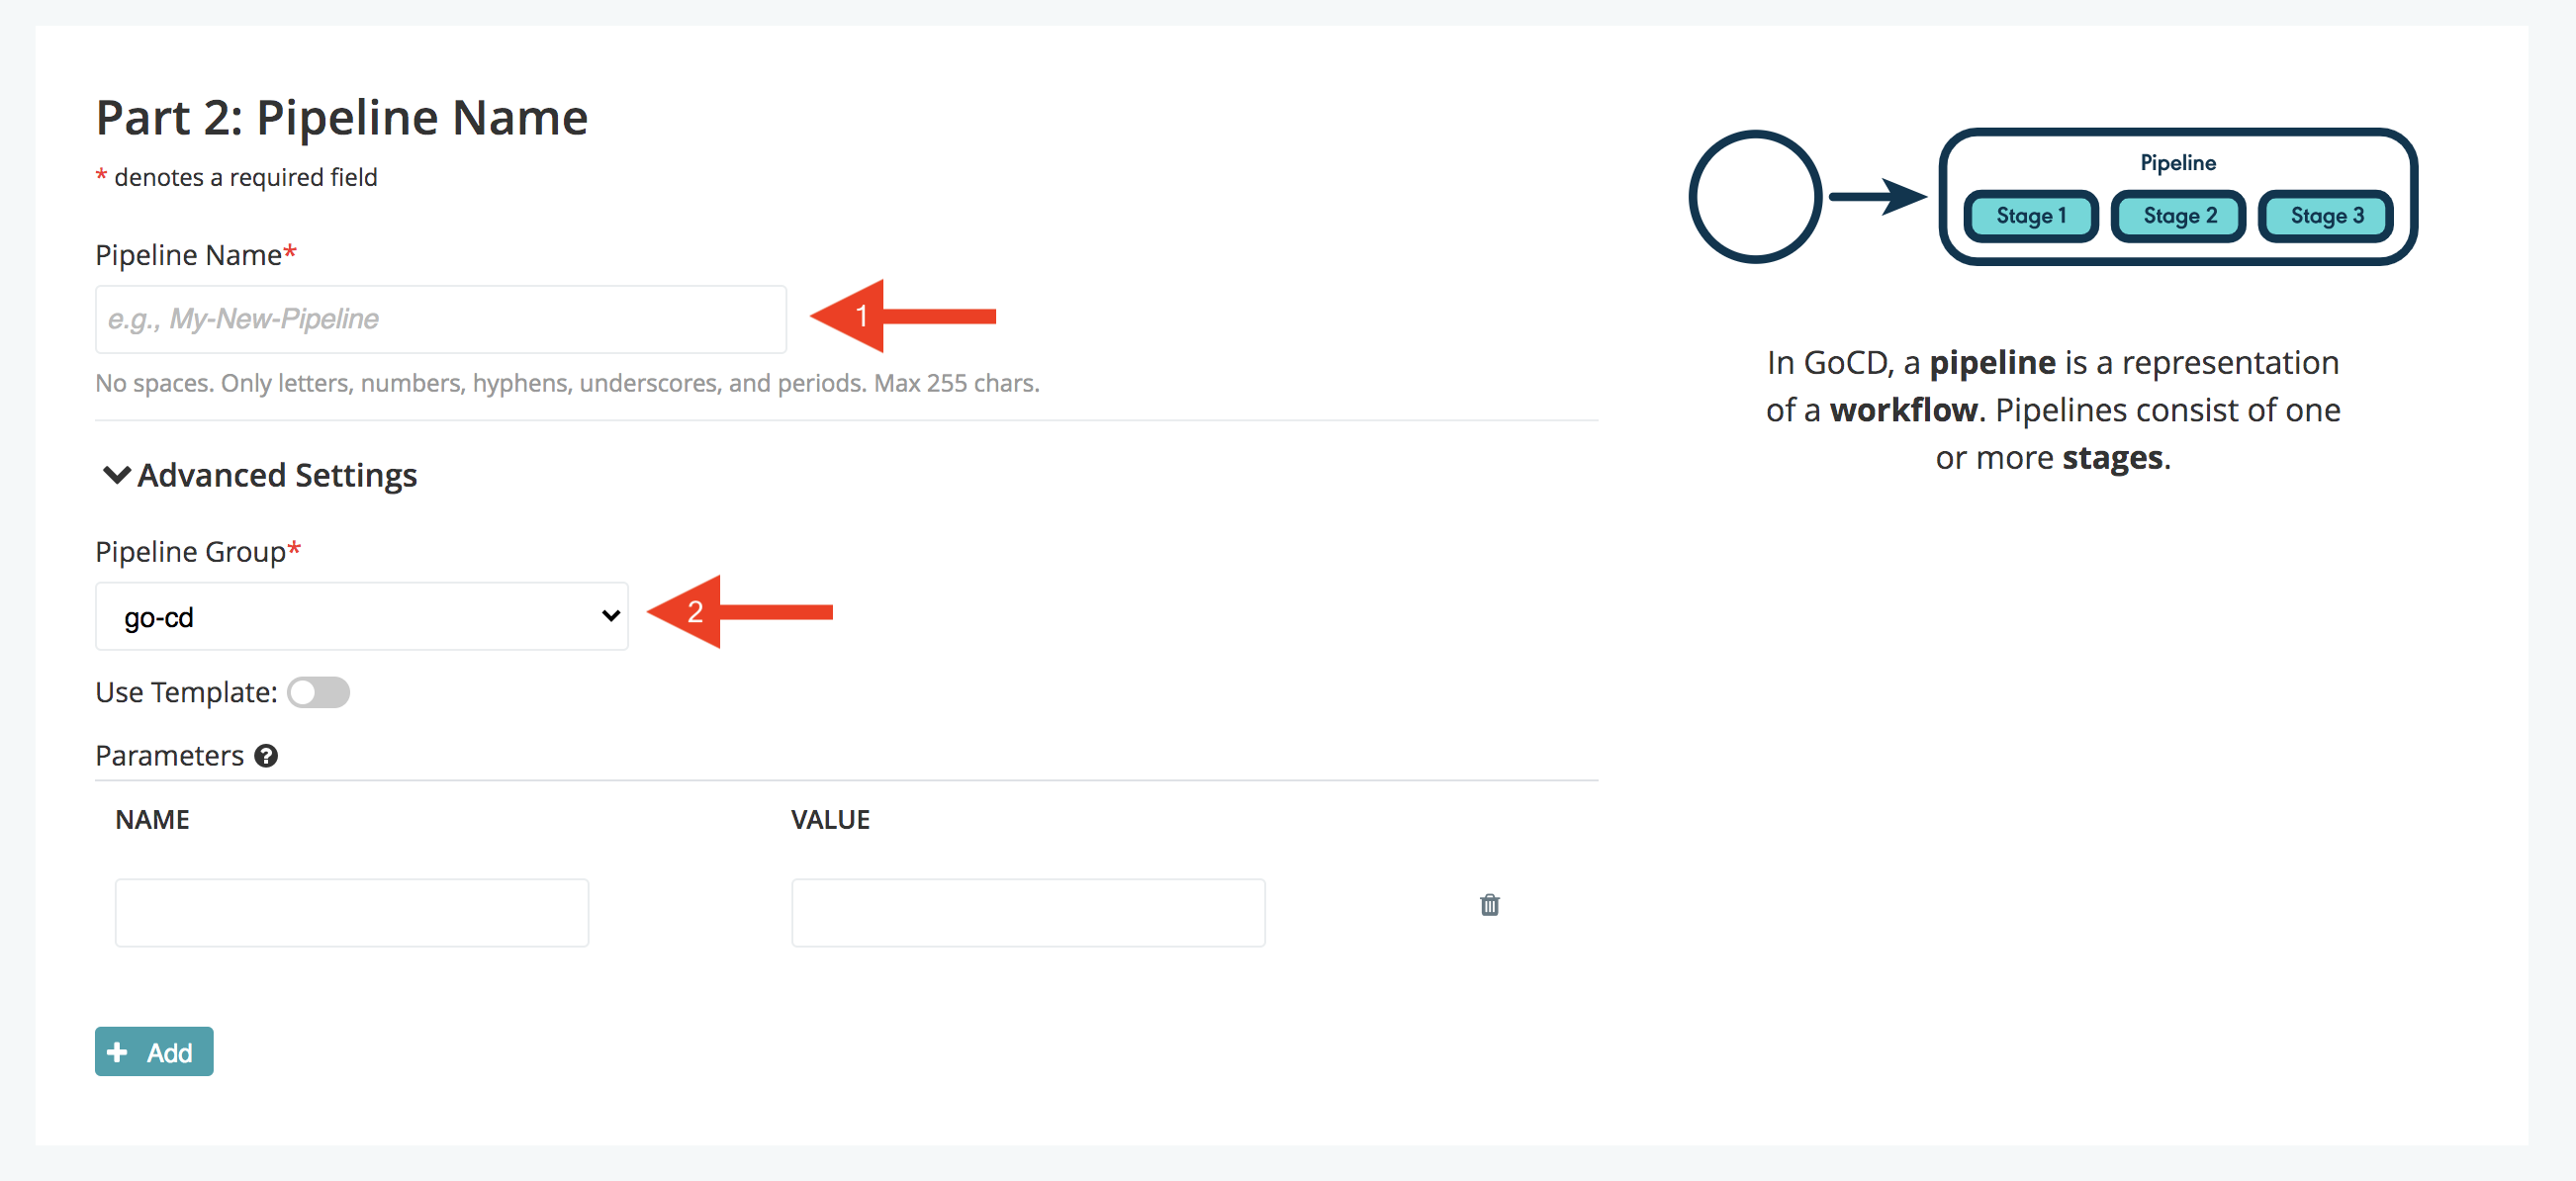
- Fill in the pipeline name
- Select a pipeline group. Also fill in the parameter if using a template.
Step 3: Stage Details
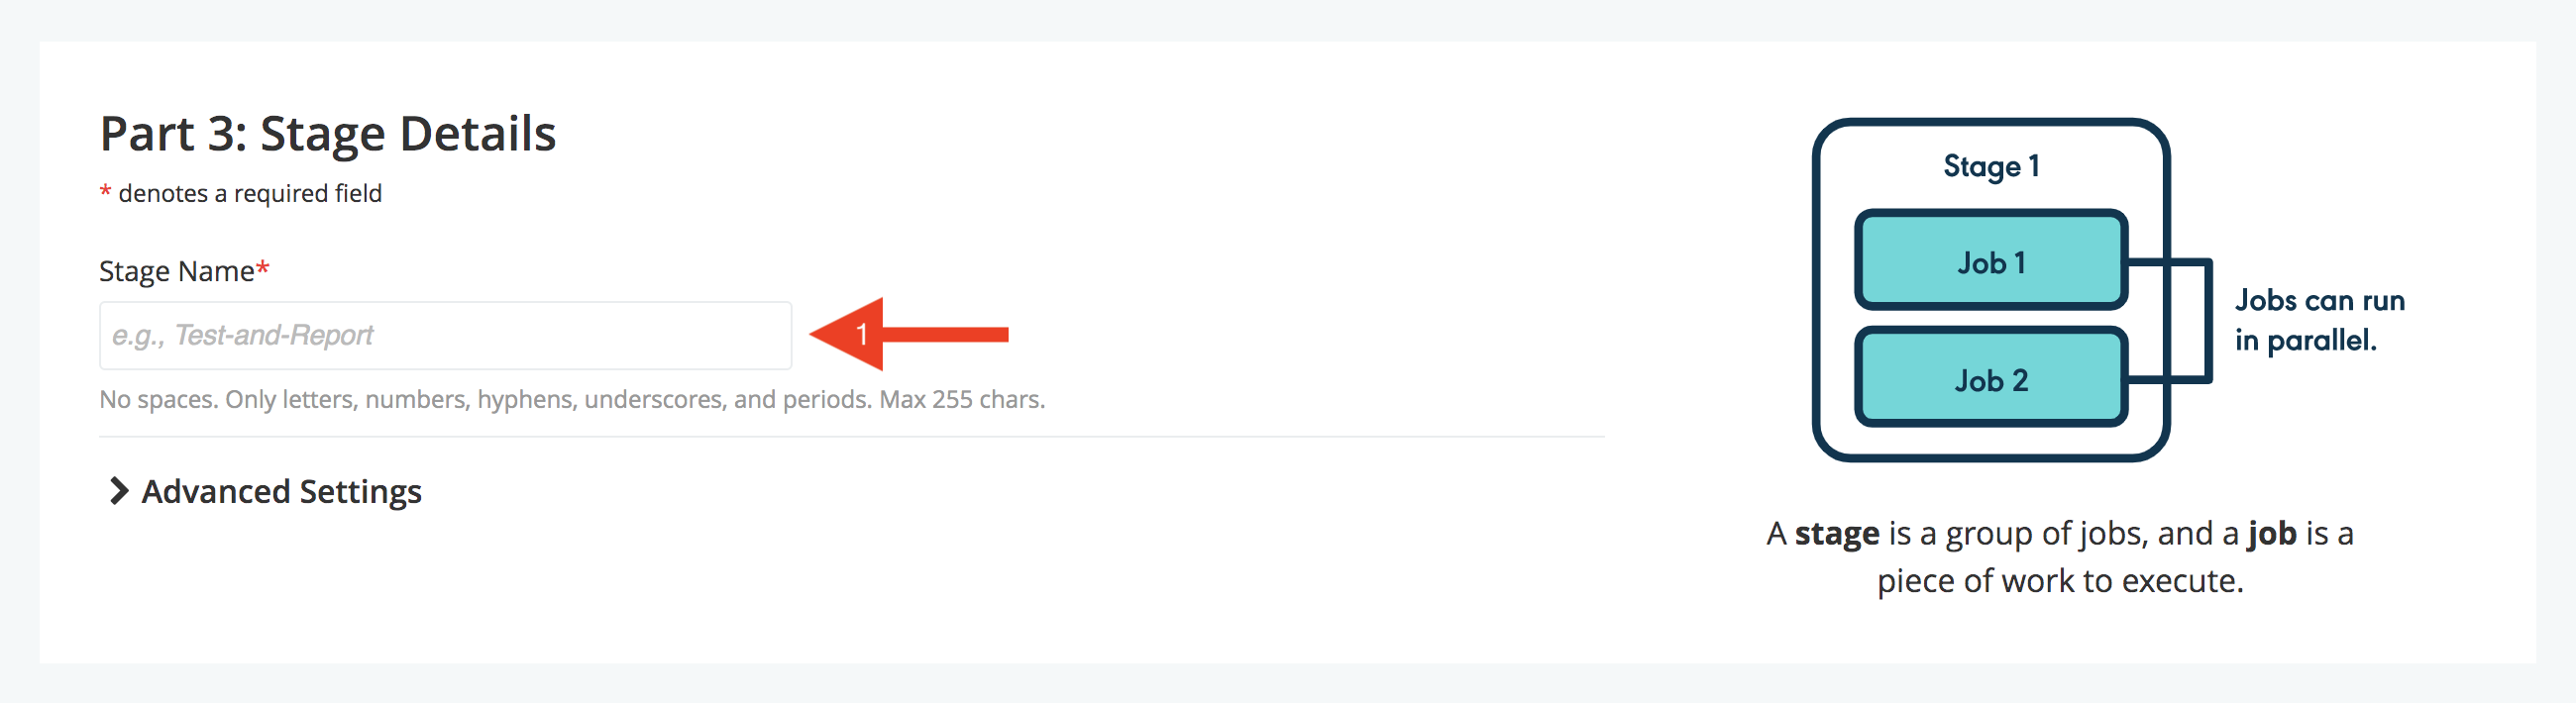
A pipeline contains one or more stages. Define the first stage of your pipeline
- Fill in the Stage name.
Step 4: Job and Task Details
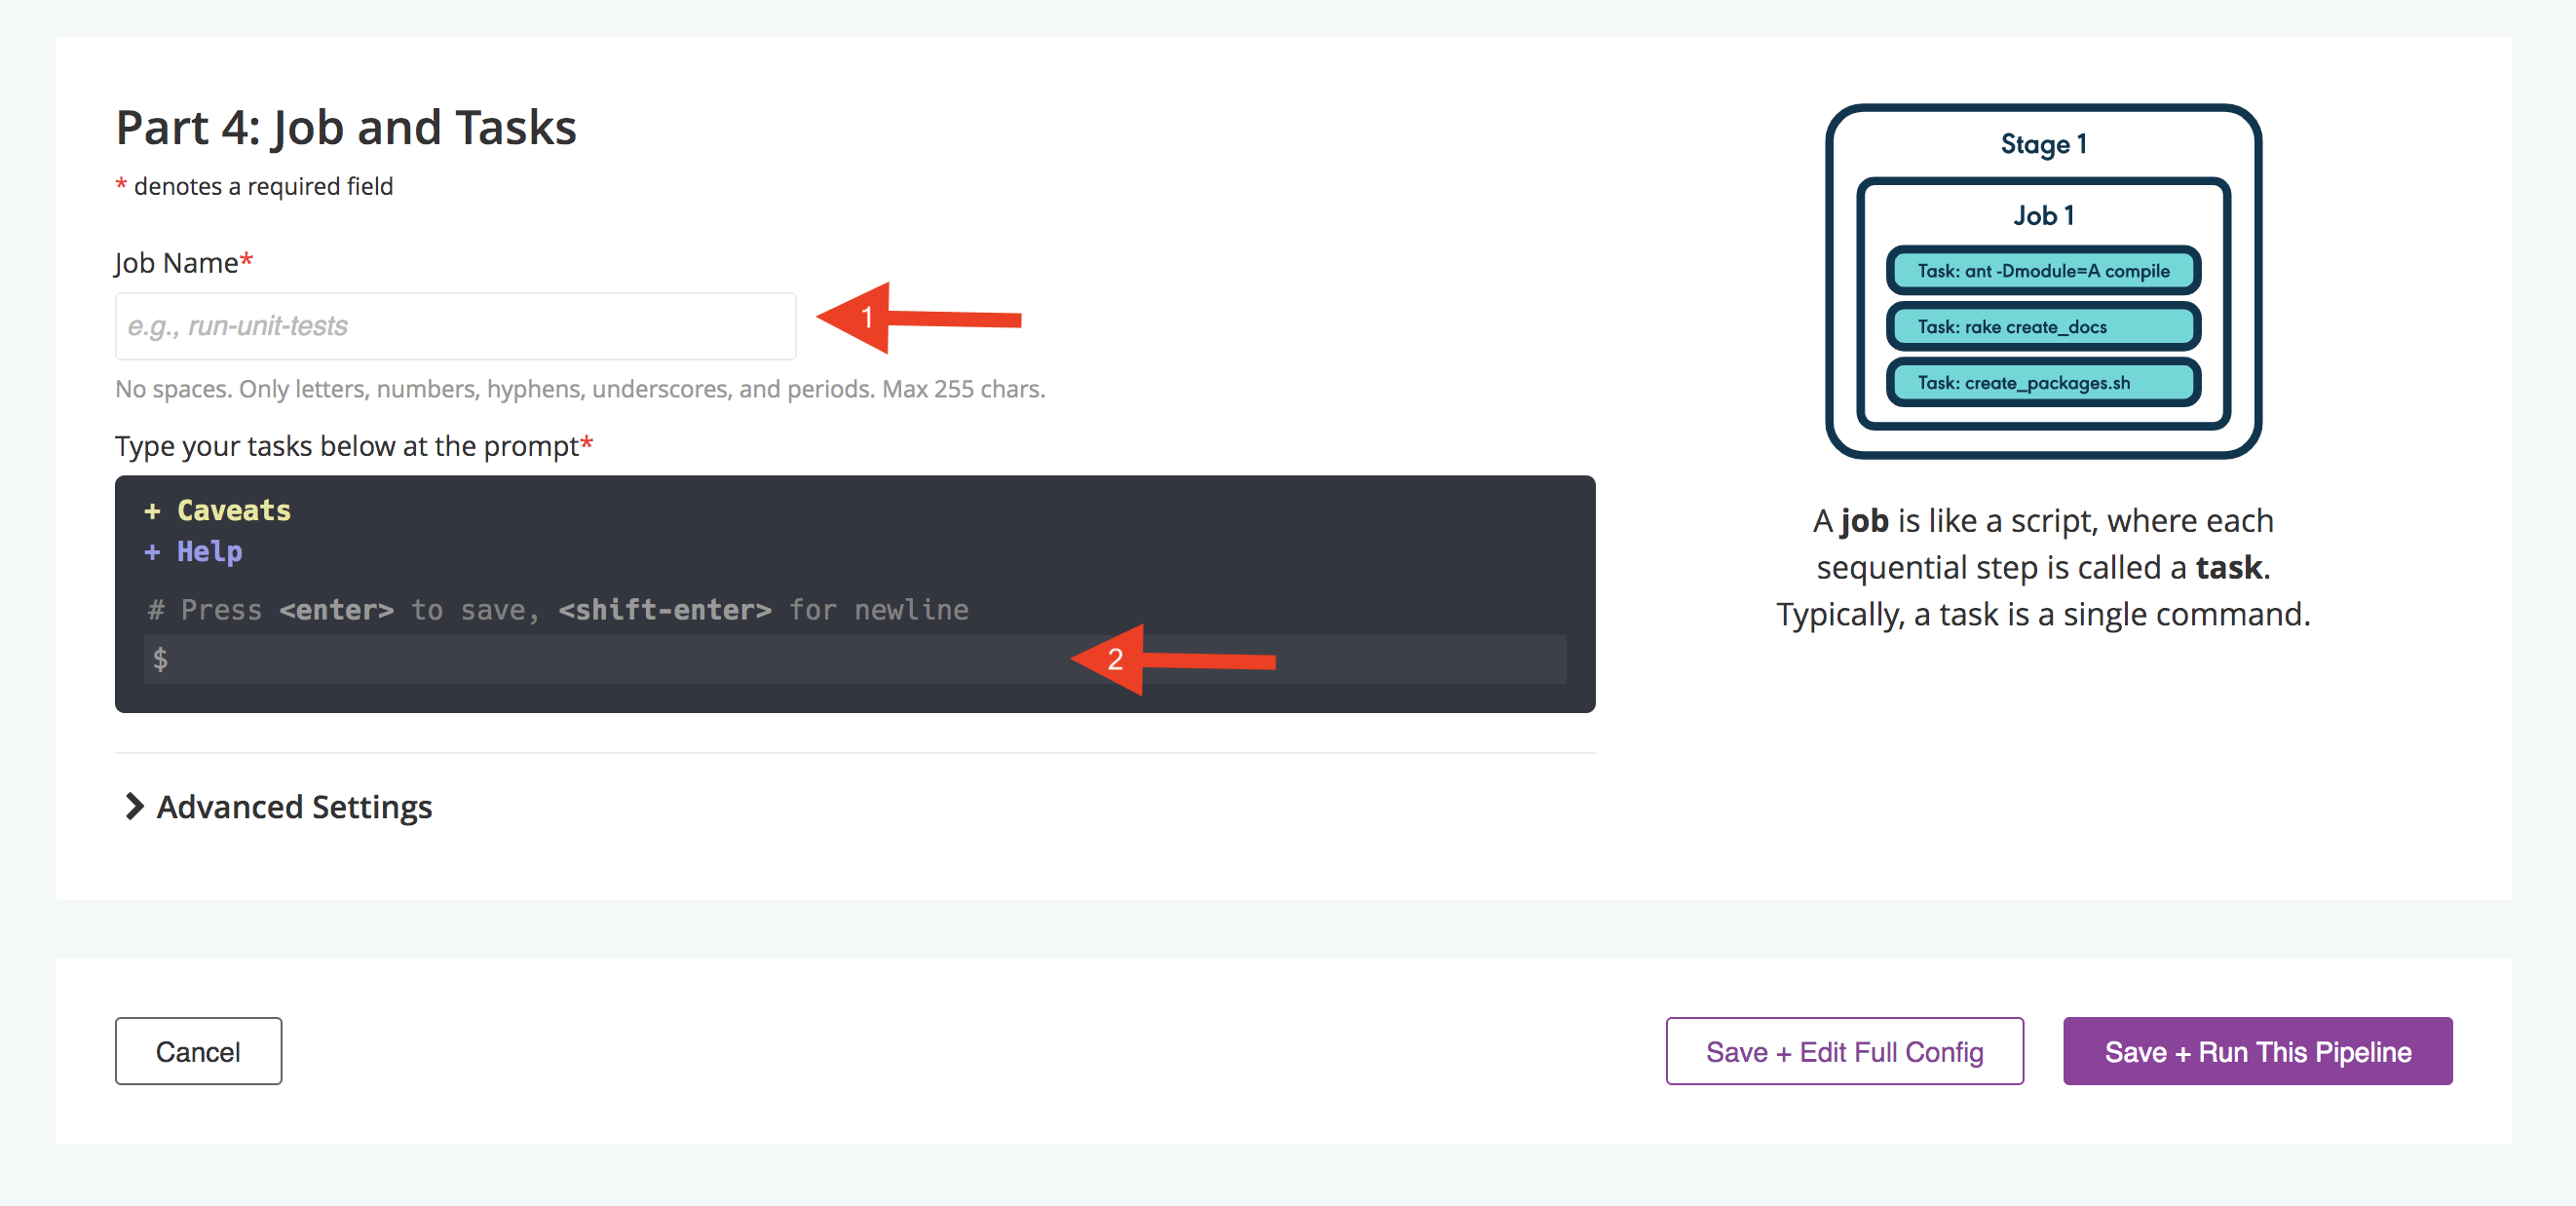
- Fill in the Job name.
- Fill in the command for the task. If you use Ant, NAnt or Rake for scripting, specify the command line syntax for that tool. GoCD provides a convenience wrapper for these tools. You can make use of them on the materials tabs of pipeline config edit page.
- Click on “Save + Run This Pipeline” will save the pipeline and try to schedule a build for the same. Clicking on “Save + Edit Full Config” will save the pipeline and open the edit page for further configuration.
See the Managing pipelines documentation for editing these settings following the creation of your pipeline.
Initial task settings
Ant
The Ant task allows you to run an ant script. GoCD does not include Ant and so you must ensure that it is already on the command path. By default it will use build.xml in the agent’s working directory as the build file. If you want to customize the build file or build target, click the edit link to change the defaults.
For this option to work, Ant needs to be installed on the GoCD Agent(s) and the go user should be able to execute it.
NAnt
The NAnt task allows you to run a NAnt script. GoCD does not include NAnt and so you must ensure that it is already on the command path. By default it will use default.build as build file in the agent’s working directory. If you want to customize the build file or build target, click the edit link to change the defaults.
For this option to work, NAnt needs to be installed on the GoCD Agent(s) and the go user should be able to execute it.
Rake
The Rake task allows you to run a ruby rake build. GoCD does not include ruby or rake and so you must ensure that it is correctly installed on the agents. GoCD will assume the standard rakefile exists in the working directory of the agent.
For this option to work, Rake needs to be installed on the Go Agent(s) and the go user should be able to execute it.
Custom Command
In addition to the above tasks, GoCD allows you to run anything on the command line.
You can see the complete configuration reference here.
Clone an existing GoCD pipeline
Clone pipeline functionality helps you create a new pipeline from an existing pipeline by giving it a new name. Typically when setting up a pipeline for a new branch, it is very useful to take an existing pipeline and clone it.
If the user is a pipeline group admin, they can clone the new pipeline into a group that they have access to. If the user is an admin they can clone the pipeline into any group or can create a new group by providing a new group name.
- Navigate to the Admin tab
- Locate the pipeline that needs to be cloned
- In that row, click on the “Clone” icon.

- Fill in the name of the new pipeline
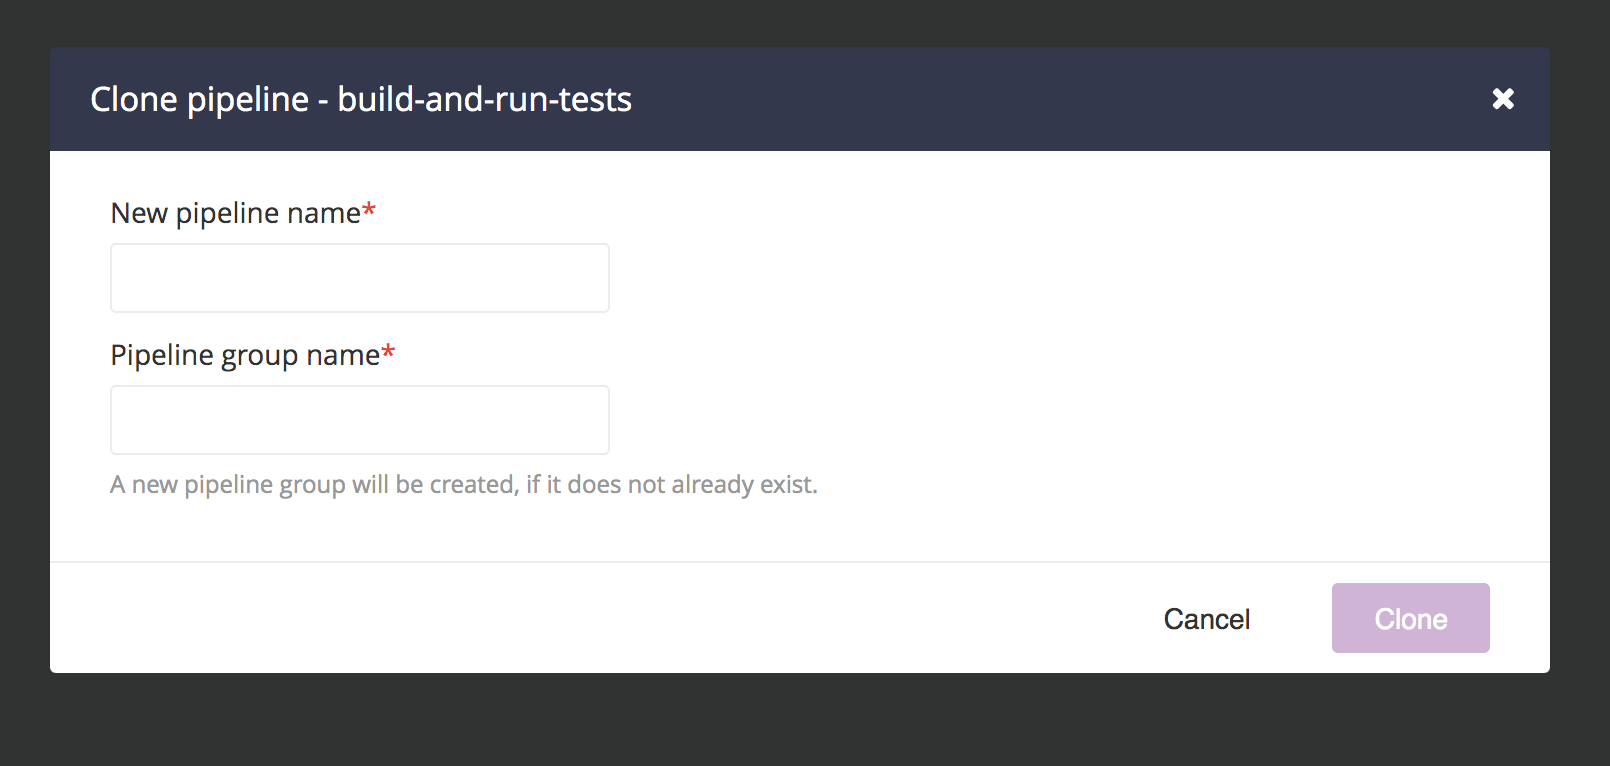
- Select a pipeline group. If you are an admin, you will be able to enter the name of the pipeline group or enter a new group name
- Click “Clone”
 Suggest edits to this page